Specifications
Shape:
Square, Arched
Color:
Extra White
Material:
Shells
Surface:
Glossy
Sheet Size:
12"In(L) x 12"In(W)
Thickness:
3mm
Chip Size:
15mm(L)x15mm((W)
Covers:
1 Sq.ft / sheet
Weight:
0.35Kg / sheet
Water Absorption Rate:
Zero
Applications:
Walls, Backsplash wall, Bathroom wall, Kitchen
Sold By:
Piece
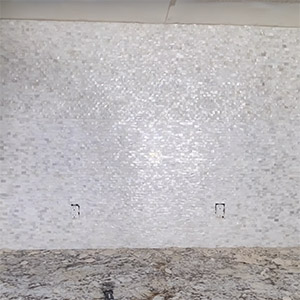
Seashell pearl tile
Made of natural pearl shell, every chip has different color, our Mesh Mounted Mother of Pearl Mosaic Tiles can be used in almost all the places you may imagine. It can be used on the wall, kitchen backsplash, bathroom, table top, sauna place, etc. You can even use them on the radial column, cabinet as well as furniture. Mother of Pearl Tiles, also called Pearl tile, Shell Tile, Pearl Mosaic, some even called it jewelry Pearl tile, are absolutely natural and green building materials which is ideal surface solution for creation of luxury but long lasting look of your architectural space.
Before Installation
Dry fitting your pattern first to think about your cuts in advance and to make sure you like the pattern, this will also help you to make a decision on where to put each piece of tiles, which is especially important with mother of pearl tile that has a lot of variation. Due to the nature of the material no two pieces are exactly alike.
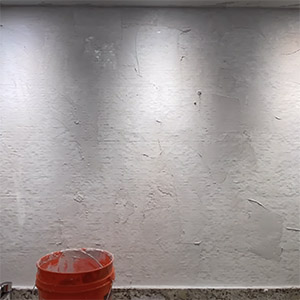
Check the substrate
Before tiling, make sure the surface the tiles are being installed on will be strong and smooth. Cement board, concrete, drywall, or foam board is good, as these surfaces can handle the moisture of the tiling process. Plywood should be avoided since the wood will warp with the added moisture and it will also be less waterproof after tilling.
Get thinset ready
We recommend using a white thinset to avoid affecting the color of the tile.
Tools
Square notch trowel should be used when installing the pearl shell tile and ridges should be smoothed down with the flat side of the trowel prior to fixing the tiles in the mortar bed. Tiles larger than 3x3 should be back-buttered with a thin continuous layer of the thinset applied with the flat side of the trowel.
 Cutting
Use a glasscutter (score and snap) with a new diamond wheel and a wet tile saw for best results when cutting our pearl tiles. Wetting the diamond wheel and saw before cutting will produce the smoothest cuts.
Grouting
The purpose of the grouting is to make the seams go away and make the look of mother of pearl tiles a lot more flawless. Make sure you cover all your surfaces and protect them because the grouting process is a very messy process.
A non-Sanded grout is highly recommended, which is latex or polymer modified and compliant with A118.4 should be used for mother of pearl tiles because the non-sanded grout will not scratch the surface so that it will maintain the natal beautiful look of the mother of pearl tiles.
Cover all your tile with a nice layer of grout.
 After grouting, use the sponge to wipe off excess grout - do not over wash. Wipe with minimal pressure at a 45-degree angle to joints and wash the sponge after wiping once with each side. Any remaining haze can be cleaned off with a dry towel after the grout surface has dried fully. Clean excess grout as the work progresses before it has hardened completely. In the event that a grout haze forms, you can use an acid-free remover to remove it. Acids should never be used for cleaning grout haze.

P.S: Mother of pearl tile is a natural and handcrafted product, it’s a very thin product, so don’t use it for the floor.
Decormosaic offers a 30-day standard return policy for this item, we accept returns on damaged items that ship via freight, as long as you report the damage within 5 days of delivery. For our full return policy, click here.
-Ready to ship to the contiguous U.S. in 5-7 business days by Air for full sheet order.
-Shipping time to contiguous U.S. for sample order will be 10-15 days.
-Please understand that the shipping time may be delayed by a few days than normal due to the impact of the covid 19.
More detail by clicking here
Product reviews can be carried out after the member login, please
click here to login